What Are the Top Types of Rice Harvesting Equipment?
Rice harvesting is a short, unforgiving window. A wet field can bog down a combine; a delayed harvest can leave ripe panicles exposed to wind and rain. The scale is enormous. FAOSTAT reports that global paddy rice production reached roughly 787 million tonnes in 2023. That volume makes harvesting speed, grain recovery, and field conditions practical concerns—not minor details.
Rice Harvesting Equipment ranges from sickles and reapers to reaper-binders, threshers, and combine harvesters. Each option suits different field sizes, labor supplies, budgets, and crop conditions. FAO’s Rice Market Monitor tracks global production and trade, while IRRI’s rice knowledge resources explain how harvesting methods affect field operations and grain quality. These sources provide useful context, but they cannot decide which machine fits a particular farm. Soil firmness, plot shape, lodging, and transport access matter. So does operator skill.
Former IRRI Director General Robert Zeigler has called for producing “more rice with less land, less water, less labor, and fewer chemicals.” This principle helps frame equipment choices, though it is not a machine-selection rule. A small reaper may suit narrow plots; a combine can cut, thresh, and clean grain in one pass. Yet higher capacity does not guarantee lower losses. Poor adjustment can scatter grain behind the machine. The best choice is specific to the field. That deserves a closer look. This guide compares the main equipment types, their strengths, and their trade-offs, so readers can assess what fits their harvest—not just what looks powerful.
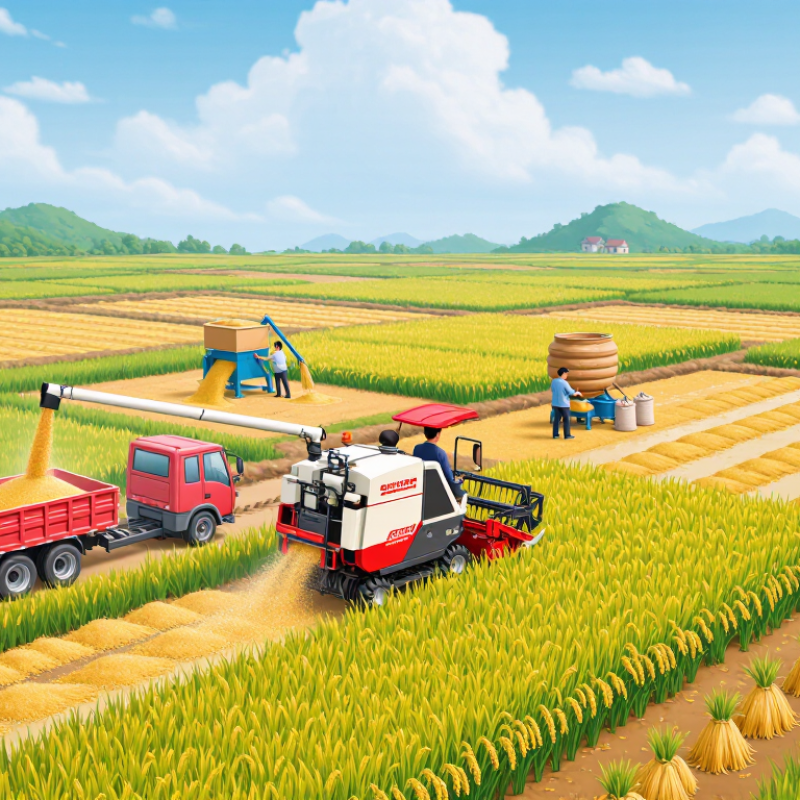
Rice Harvest Timing: Grain Is Commonly Cut at 20–25% Moisture
Rice is commonly cut when grain moisture reaches about 20–25%, but this is a working range, not a fixed rule. Variety, weather, and field conditions can shift the ideal day. A handheld moisture meter helps, though one sample rarely tells the whole story. Check several parts of the field, including shaded and exposed areas.
A combine harvester cuts and threshes rice in one pass, so timing affects both grain quality and machine performance. Grain that is too wet may be harder to thresh and dry efficiently. Grain that is too dry can crack or shatter during harvesting. Watch the panicles, too. Mature grains feel firm, while straw color alone can mislead. Small details matter.
A reaper followed by a separate thresher may suit smaller fields, but it adds handling steps. Before starting, check cutter height and threshing settings; lodged or uneven rice may need adjustments. Conditions change across a field, sometimes within a few rows. That part is easy to underestimate. Keep moisture readings and harvest notes, then compare them with grain quality after drying. A practical record can improve the next decision.
Rice Harvesting Equipment and Grain Moisture
Rice is commonly harvested when grain moisture is around 20–25%. This target applies across harvesting methods; actual timing depends on crop and field conditions.
Common equipment includes sickles for manual cutting, reapers for cutting and windrowing, and combine harvesters for cutting and threshing in one pass.
Reapers and Reaper-Binders: Cutting and Bundling Rice Stalks
Rice reapers cut standing rice stalks close to the ground, leaving the crop in rows for collection. A basic reaper suits farms where workers can gather and tie the cut stalks afterward. Its cutting bar needs a steady feed of plants; tangled weeds or lodged rice can slow the work. Timing matters. Harvesting too early may leave grain immature, while delayed cutting can increase shattering and field losses.
A reaper-binder adds a tying mechanism, gathering stalks into compact bundles as it moves. These bundles are easier to handle and dry than loose stems, though their size and tightness depend on crop condition and machine adjustment. Check the tying parts, cutting blades, and knot formation before a long field run. Damp soil can also affect traction, especially in low, soft plots. Small differences matter. It is easy to assume a binder always saves labor, but twine supply, repairs, and uneven fields can reduce that advantage. Operators should match machine width and turning space to field layout, and keep people clear of moving parts. A careful test pass often reveals problems before a full day’s harvest.
What Are the Top Types of Rice Harvesting Equipment? - Reapers and Reaper-Binders: Cutting and Bundling Rice Stalks
| Equipment type | How it handles rice stalks | Typical field fit | Main advantage | Key consideration |
| Walk-behind reaper | Cuts standing rice and lays the stalks in rows or small piles. It does not tie the stalks into bundles. | Small plots and fields where a compact, maneuverable machine is useful. | Mechanizes cutting while leaving the crop ready for gathering, drying, or threshing. | The cut crop generally needs to be collected and handled separately. |
| Riding or tractor-mounted reaper | Uses a cutting mechanism to harvest standing stalks and typically deposits them in a windrow or laid-down row. | Larger, accessible fields with enough space for the machine to turn and travel. | Can cover more ground than a small walk-behind machine, depending on field layout and operating conditions. | Wet or soft ground, narrow plots, and irregular field boundaries can limit access and maneuverability. |
| Reaper-binder | Cuts rice stalks, gathers them, and ties them into sheaves or bundles for handling. | Fields where bundled stalks are preferred for collection, drying, or subsequent threshing. | Combines cutting and bundling in one operation, reducing the need to tie sheaves by hand. | Requires suitable crop and field conditions for reliable feeding and tying; bundles still need to be moved and threshed. |
Actual field performance depends on crop condition, terrain, field size, machine setup, and operator skill.
Rice Combine Harvesters: Cutting, Threshing, and Cleaning in One Pass
Rice combine harvesters cut standing rice, thresh the panicles, and separate grain from straw in one pass. This can save time during a narrow harvest window. But performance depends on field conditions, crop maturity, and machine settings. IRRI’s Rice Knowledge Bank recommends harvesting at roughly 20–25% grain moisture. Harvesting too early can leave immature kernels; waiting too long may increase shattering. The combine does not replace careful drying or storage.
Inside the machine, a cutter bar feeds stalks into a threshing drum, where grain is released from the panicles. Sieves and airflow then separate grain from chaff. Operators should watch for cracked kernels, unthreshed heads, and grain spilling behind the machine. A few minutes of checking can reveal losses that are easy to miss from the cab. FAO’s 2021 Food Loss Index estimated that 13.2% of food was lost globally between harvest and retail across all commodities, not rice alone. It underscores why post-harvest handling matters, though a combine cannot prevent every loss.
Tips: Check grain moisture and field firmness before starting. Adjust travel speed and threshing settings as crop conditions change. After a short test pass, inspect the grain tank and the ground behind the combine. Wet or lodged rice can still cause trouble. A quick adjustment may help, but it is worth measuring rather than guessing.
Stationary Rice Threshers: Separating Grain from Cut Stalks
Stationary rice threshers separate grain after stalks have been cut and carried to the machine. They suit small plots, uneven fields, and farms where a mobile harvester cannot work easily. Feed stalks steadily into the drum; a rushing pile can leave grain attached or send kernels flying. The IRRI Rice Knowledge Bank recommends harvesting rice at about 20–25% grain moisture. That range helps guide threshing, but crop variety and field conditions still matter.
A stationary thresher keeps the threshing point in one place, making grain collection and machine checks more manageable. Operators can inspect the grain outlet for unthreshed panicles and watch for excess broken kernels. However, setup matters: drum speed, concave clearance, and feed rate should match the crop. Small adjustments help. The FAO’s rice post-harvest guidance recommends drying grain to about 14% moisture for safer storage. Threshing is only one step; damp grain can still spoil afterward.
Tips: Lay a clean tarp beneath collection areas to reduce grain loss. Test a small bundle before feeding a full load, then check the straw and grain sample. IRRI also advises prompt drying after threshing. A practical reminder: field conditions vary, and one setting rarely works perfectly all day.
Paddy Dryers: Reduce Grain Moisture to About 14% for Storage
After threshing, paddy may feel dry on the surface while kernels still hold uneven moisture. A paddy dryer removes excess moisture with controlled airflow and heat, helping prepare grain for storage. The practical target is often about 14% moisture, but the right level can vary with grain condition and storage plans.
Small details matter. Spread grain evenly across the drying floor or bed so air can pass through the full layer. Check moisture in several spots with a calibrated meter, rather than relying on touch or appearance. Take readings after mixing the grain; pockets near the center may stay wetter. The tricky part? Uniformity.
Use moderate heat and steady airflow. Excessive heat can crack kernels, while slow drying in humid conditions can leave grain vulnerable to spoilage. After drying, let the paddy cool before bagging or moving it into storage. Warm grain sealed too soon may collect condensation. It is tempting to treat 14% as a magic number, but it is only a useful guide. Recheck readings if weather, batch size, or storage duration changes. A small sampling mistake can give false confidence.