How to Use an Automotive Motor Tester?
An Automotive Motor Tester can help identify problems in a starter, alternator, or other vehicle motor system. The tester’s functions vary by model, so check its manual before connecting leads or selecting a test mode. Some devices measure voltage and current; others provide guided checks for specific components. That distinction matters. A reading only helps when you know what the tester is measuring.
Begin with a stable vehicle, the ignition off, and the parking brake set. Inspect the tester’s leads for cracked insulation or loose clips. Connect each lead to the specified terminal, matching polarity where required. Keep cables clear of belts, fans, and hot surfaces. Small details count. If the battery is swollen, leaking, or visibly damaged, stop and seek qualified service rather than testing it yourself.
A careful test follows a simple pattern: choose the correct mode, make the prescribed connections, and compare the result with the vehicle or component specifications. Record the reading and the conditions, such as whether the engine was running. One number rarely tells the whole story. A low reading might point to a weak battery, a poor connection, or a charging-system fault. The tester can narrow the possibilities, but it cannot diagnose every cause on its own. This guide explains how to prepare, connect, operate, and interpret an Automotive Motor Tester while recognizing when further inspection is needed. Double-check the setup. It is easy to rush, and that is where mistakes begin.
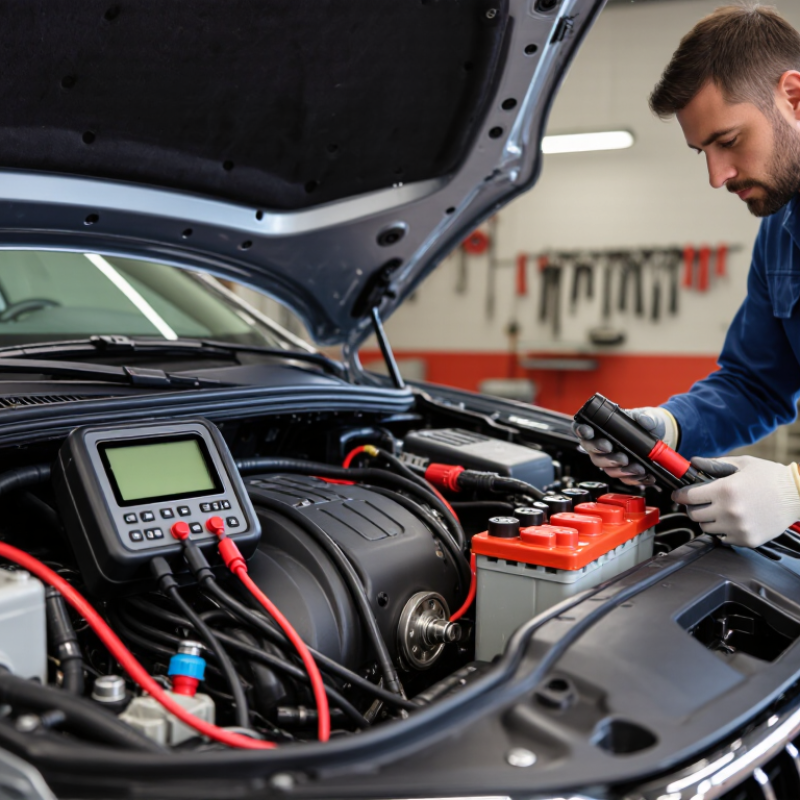
Understand the Automotive Motor Tester and Its Functions
How to Use an Automotive Motor Tester?
Understand the Automotive Motor Tester and Its Functions
An automotive motor tester helps technicians assess a motor’s electrical condition and operating behavior. It can measure winding resistance, insulation resistance, voltage, current, and phase balance. Some systems also capture speed, temperature, or vibration. The exact functions depend on the tester and motor type. On a bench, a technician may compare phase readings and look for unusual resistance differences. In a vehicle, testing can help separate motor faults from wiring or controller problems. The IEA’s Global EV Outlook 2024 reports nearly 14 million electric-car sales in 2023, about 18% of global car sales. That expanding fleet makes dependable motor diagnosis increasingly important.
Before testing, identify the motor and follow the tester’s instructions. Isolate the motor from its controller when the procedure requires it, then inspect connectors and cables for heat damage or corrosion. Select the correct test mode and compare results with service specifications, not a generic “good” value. Record readings under consistent conditions; temperature can shift resistance measurements. A stable reading matters. But it is not proof that a motor performs well under load. If results conflict with noise, vibration, or intermittent symptoms, repeat the test and check the setup. This can feel slow. It is still better than replacing a sound motor based on one unexplained number.
Prepare the Vehicle and Tester for Safe Operation
Before using an automotive motor tester, park on level ground, select Park or Neutral, and apply the parking brake. Chock a wheel if the vehicle could move. Work in a well-ventilated area; exhaust can collect quickly in a closed bay. Switch off the ignition before attaching leads, unless the tester’s instructions require another sequence. Check cables for cracked insulation, bent pins, or loose clamps. Keep hands, clothing, and leads clear of belts and fans, which may start unexpectedly. Wear eye protection, and remove metal jewelry near the battery. The U.S. Bureau of Labor Statistics recorded 5,283 fatal work injuries across all industries in 2023. That broad figure is not automotive-specific, but it underscores why routine precautions matter.
Tips: Confirm the tester’s voltage range and connection points in its manual. Connect the ground lead only to a suitable point. Keep the cable away from hot exhaust parts. Small detail, big risk.
Before starting a test, make sure the vehicle is stable and accessories are switched off. Follow the tester’s prompts rather than guessing at readings. If a lead becomes warm, slips, or sparks, stop and reassess the setup. I sometimes find that a rushed inspection misses a damaged clip; a second look is worth the extra minute. After testing, switch off the ignition before removing leads, then store the tester dry and untangled.
How to Use an Automotive Motor Tester? — Prepare the Vehicle and Tester for Safe Operation
Before testing: Park securely, switch the ignition off, inspect the tester leads and clamps for damage, and use the vehicle’s designated test points. Follow the tester and vehicle service instructions. These approximate open-circuit voltage references apply to a rested 12 V lead-acid battery at about 25°C; temperature, battery type, and recent charging or use can affect readings.
Connect the Tester to the Motor and Select a Test
Before connecting an automotive motor tester, identify the motor terminals using the vehicle’s wiring diagram or service information. Switch off the ignition, remove the key, and isolate the circuit as instructed. Wait until moving parts stop, then check the leads for cracked insulation or loose clips. Small details matter.
Connect the tester’s leads to the specified terminals, not to nearby painted surfaces. Make firm contact with clean metal, and keep clips apart to avoid an accidental short. If the motor is still installed, check whether connected control modules or sensors could be affected by the chosen test. Read the tester’s instructions; lead colors and menu labels can vary. Guessing is a poor shortcut.
Select a test that matches the symptom and the tester’s capabilities. For a winding check, choose resistance and compare the result with the service specification. For a supply problem, use the appropriate voltage test and follow the tester’s procedure for powered circuits. Keep the probes steady while the reading settles. A number can look convincing and still mislead if the motor remains connected to other circuitry. Record the result, inspect the connections, and repeat the measurement if it changes unexpectedly.
Run the Test and Record the Readings
Before connecting an automotive motor tester, inspect the leads for cracked insulation and confirm the vehicle is secure. Check the tester’s instructions, since connection points and test modes vary. Set the correct range before attaching the clamps; a wrong setting can distort results or damage equipment. Keep hands and loose clothing clear of moving parts. Let the engine cool.
Run the test under the conditions specified for the motor or system. Watch the display during operation, not just after it stops. Record voltage, current, speed, and any fault codes the tester provides. Note the battery condition, engine temperature, test mode, and whether accessories were switched on. Write it down. A reading without context is hard to compare later. If values fluctuate, record the range instead of choosing the most convenient number. Repeat the test once under the same conditions, then compare results with the vehicle’s service specifications. It is easy to rush this part. A clean-looking reading can still be misleading if a clamp was loose or the battery was weak. Stop if the tester shows an overload, an unexpected noise occurs, or wiring becomes hot.
How to Use an Automotive Motor Tester? - Run the Test and Record the Readings
Test item: 12 V DC automotive auxiliary motor
Test conditions: Bench-mounted motor, regulated 12.0 V DC supply, 22 °C ambient temperature
Procedure: Run the motor at no load, half load, and rated load; record stabilized readings at each point.
| Test Step | Load Condition | Supply Voltage (V) | Current (A) | Speed (r/min) | Case Temperature (°C) | Vibration (mm/s RMS) | Result |
| 1 | No load, stabilized for 30 seconds | 12.0 | 1.3 | 2,800 | 24 | 1.2 | Pass |
| 2 | Half load, stabilized for 60 seconds | 12.0 | 4.2 | 2,200 | 31 | 1.8 | Pass |
| 3 | Rated load, stabilized for 2 minutes | 11.9 | 7.8 | 1,750 | 42 | 2.4 | Pass |
Interpret the Results and Disconnect the Tester
Read the tester’s voltage, current, speed, and temperature together; one number rarely tells the whole story. Compare each result with the vehicle or motor service specification, using the same test conditions. A high current reading with low speed can suggest excessive load, worn components, or poor connections. Check clamp placement and lead contact before condemning a motor. The U.S. Department of Energy’s 2014 motor-systems sourcebook reports that motor-driven systems use about 68% of electricity in U.S. manufacturing. That figure is industrial, not automotive, but it shows why reliable motor measurements matter.
Look for stable readings, not just a brief peak. If the value wanders, repeat the test after checking battery charge, cable condition, and secure connections. I still pause over borderline results; real-world readings can be messy. Record the ambient temperature and test setup, then compare again with the specified limits. Never treat a tester’s pass indicator as a substitute for the vehicle’s service data.
Tips: Stop the motor and switch off the tester before removing leads. Follow the tester manual and vehicle procedure; isolate the power source, allow stored energy to dissipate, and verify the circuit is safe. Remove the negative or ground connection as directed, then the remaining leads. Do not pull cables by their wires. A rushed disconnect can damage clips—or cause a short.