
425 Sovereign Ct. St. Louis, MO 63011
SEARCH OUR WEBSITE

7 Tips to Choose the Best Drum Melter for Your Business

Choosing the right Drum Melter can directly affect production speed, product quality, and operating costs. A drum may look simple, but its contents can behave very differently under heat. Thick adhesives, waxes, resins, and oils each require careful temperature control. Small temperature changes can alter viscosity, flow, or final performance. That matters.

This guide explores seven practical tips for selecting equipment that fits your process. It considers drum size, heating method, temperature range, discharge speed, and available floor space. It also examines insulation, controls, cleaning access, and energy use. A reliable Drum Melter should heat materials evenly without creating hot spots. Poor heat distribution may damage sensitive formulations or extend production time. Your operators should understand the controls quickly. Complicated settings can invite mistakes during busy shifts.

Real-world performance deserves more attention than attractive specifications. Ask suppliers for test results, maintenance guidance, warranty details, and references from similar industries. If possible, test your actual material before purchasing. A machine that performs well with oil may struggle with a high-viscosity compound. I have seen buyers focus on purchase price and overlook drum handling, ventilation, or service response. That assumption can become expensive.

Safety must remain part of every comparison. Look for dependable temperature limits, guarded heating areas, stable frames, and clear operating instructions. Check whether the equipment suits your workplace standards and local requirements. No checklist is perfect. Your team may discover practical issues after installation, especially around cleaning and material transfer. Honest evaluation, documented testing, and supplier expertise can reduce those surprises. A carefully selected Drum Melter should support consistent output, safer handling, and dependable long-term production.
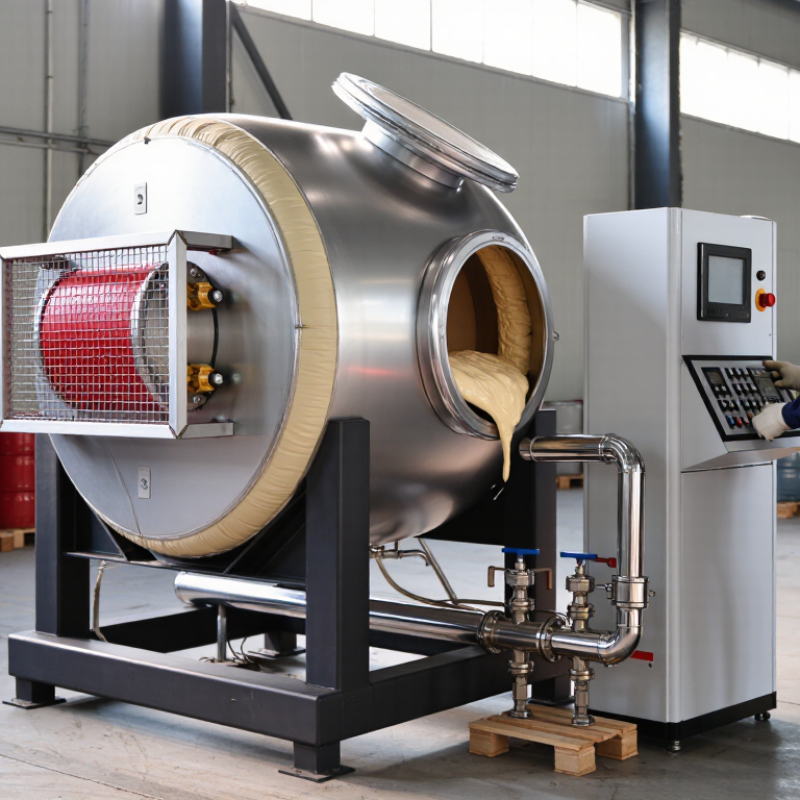
7 Tips to Choose the Best Drum Melter for Your Business

Define Your Material, Melting, and Production Requirements

Choosing the best drum melter starts with defining your material, melting, and production requirements. Do not begin with machine size alone. Identify the material’s viscosity, moisture level, softening point, and sensitivity to heat. A thick compound may need stronger heating control than a free-flowing product. Record the material temperature at loading, melting, and discharge.

Tip 1: Test the material in a sample drum before purchasing. Watch for scorching, unmelted corners, skin formation, or excessive mixing. These details reveal more than a sales specification. Tip 2: Define your required output by shift, not by guesswork. Measure how many drums your operators process daily, including cleaning and changeover time. A machine that melts quickly may still slow production if drum handling is awkward.

Melting temperature deserves careful attention. Some materials tolerate steady heat, while others degrade after short exposure. Ask for independent test data, temperature uniformity results, and control accuracy. Confirm whether the melter supports your drum dimensions and material packaging. Think about viscosity changes during discharge, too. A material can flow well at the top and remain stubborn near the base. That happened in one of our trial setups.

Tip 3: Leave room for imperfect data. Your first production estimate may be wrong. Run a small pilot, measure actual melting time, and compare energy use. Check operator access, insulation, emergency controls, and cleaning requirements. Reliable equipment should fit the process, not force the process to fit the equipment.


Compare Drum Melter Heating Methods and Temperature Control

Choosing the best drum melter starts with the heating method, not the purchase price. Electric band heaters are compact, clean, and suitable for controlled indoor processing. They heat slowly, though. Hot water or thermal oil jackets provide gentler, more even heating around the drum. Steam systems respond quickly, but they require suitable utilities, pressure controls, and trained operators.

Temperature control deserves close inspection. Look for independent sensors near the drum wall and the material outlet. One sensor can miss cold zones inside thick or crystallized materials. A programmable controller helps maintain a steady temperature instead of creating repeated heat spikes. Check the operating range, sensor accuracy, alarm functions, and automatic shutdown response. Small details matter.

Match the system to your material’s viscosity, melting point, drum size, and processing speed. A 200-liter drum may need hours with basic bands but much less time with circulating oil. Insulation reduces energy loss and protects nearby workers from hot surfaces. Keep the control panel readable when gloves are worn. I have seen operators trust a display that measured air temperature, not product temperature. That mistake caused uneven melting. Verify sensor placement during commissioning, record actual heating curves, and leave room for adjustments when the first trial does not perform as expected.

7 Tips to Choose the Best Drum Melter for Your Business

Compare drum melter heating methods and temperature control performance using typical engineering benchmarks.

Typical benchmark ranges for industrial drum melters. Actual results vary with drum size, material viscosity, insulation, ambient temperature, and controller settings.

Selection tips:
  1. Choose a heating method compatible with the material’s viscosity and melting temperature.
  2. Prioritize precise temperature control for heat-sensitive materials.
  3. Check warm-up time when production requires frequent drum changes.
  4. Compare energy efficiency at the expected operating temperature.
  5. Select uniform heating to reduce hot spots and material degradation.
  6. Confirm the equipment supports your drum size and material volume.
  7. Review insulation, safety controls, cleaning access, and maintenance requirements.

Evaluate Capacity, Drum Compatibility, and Melting Speed

When selecting a drum melter, match capacity to your daily production, not your occasional peak. A unit that holds one drum may suit a small workshop, while continuous production often needs a larger melting chamber or automatic drum handling. Leave practical space for loading, cleaning, and operator movement. Crowded layouts slow work and increase handling risks. Measure the drum’s height, diameter, rim shape, and tare weight before comparing equipment. Small differences matter.

Drum compatibility deserves careful testing. Steel and plastic drums transfer heat differently, and some materials require direct or indirect heating. Check whether the melter supports open-head or closed-head drums, removable liners, and uneven container walls. Ask for temperature-control ranges and independent sensor locations. One sensor near the heater may not represent the material’s true temperature. That can create unmelted pockets or overheated edges. Test the actual material. Specifications alone can mislead.

Melting speed should be measured from a cold drum to a usable flow, not from an ideal laboratory sample. Material viscosity, starting temperature, moisture, and drum fill level all change the result. A faster setting is not always better. Excessive heat can damage sensitive compounds or make pumping inconsistent. Compare cycle times during a realistic trial, preferably with your normal drum size and batch weight. Record energy use, temperature stability, and cleanup time too. I have seen equipment chosen for speed become a bottleneck during unloading. The overlooked detail was access.

Check Safety Features, Energy Efficiency, and Ease of Operation

7 Tips to Choose the Best Drum Melter for Your Business

Tip: Inspect safety before performance. Choose a drum melter with an emergency stop, over-temperature protection, grounding, and heat-resistant guarding. Controls should remain visible without placing operators near hot surfaces. Check whether the unit meets applicable local electrical and workplace safety requirements. I once underestimated the value of clear warning lights. That mistake made routine checks slower than expected.

Tip: Compare real energy use, not only the advertised wattage. Thick insulation can reduce heat loss during long production runs. An accurate thermostat helps prevent overheating and unnecessary cycling. Ask for warm-up times, standby consumption, and temperature stability data. A well-insulated chamber may cost more initially, but it can lower operating expenses over time. Still, savings estimates are never perfect. Your drum size, material, room temperature, and work schedule will affect results.

Tip: Choose equipment that people can operate confidently. Simple temperature controls, readable displays, easy drum loading, and accessible cleaning areas reduce daily errors. A removable drip tray can save valuable maintenance time. Confirm that replacement parts and technical support are available before purchasing. Request a demonstration with your actual material, if possible. Operators may notice practical issues that specifications miss. Short training helps. Written operating steps and inspection records also improve consistency.

7 Tips to Choose the Best Drum Melter for Your Business - Check Safety Features, Energy Efficiency, and Ease of Operation

No. Selection Tip Key Data to Check Practical Benchmark Why It Matters Verification Method
1 Match the Drum Capacity Confirm the drum size and the number of drums that can be heated at one time. Common drum sizes include approximately 115 L and 200 L. Choose a unit designed for the actual container diameter and height. Correct sizing improves heat contact, reduces warm-up time, and prevents unstable operation. Compare the equipment drawing with the drum dimensions and filled weight.
2 Check Temperature Control Review the adjustable temperature range, sensor location, control accuracy, and over-temperature protection. A controllable range around ambient temperature to 100–200°C may be suitable, depending on the material. The required setpoint must follow the material safety data sheet. Accurate control helps prevent overheating, degradation, solidification, or unsafe vapor generation. Request the control specification and test the displayed temperature against an independent thermometer.
3 Prioritize Safety Features Look for independent over-temperature cut-off, grounding, electrical protection, insulated surfaces, and emergency shut-off capability. The unit should include documented electrical protection and a separate high-limit safety device rather than relying only on the main temperature controller. These features reduce the risk of burns, electrical faults, fire, and damage caused by controller failure. Review the risk assessment, wiring diagram, safety manual, and applicable local electrical requirements.
4 Evaluate Energy Efficiency Check rated power, insulation quality, heating-zone control, standby consumption, and estimated warm-up time. Prefer insulated designs with thermostatic cycling or multiple heating zones. Energy use should be assessed in kWh per operating cycle, not only by maximum kW rating. Lower heat loss can reduce operating cost while maintaining the required process temperature. Use a power meter during a representative heating and holding cycle.
5 Assess Ease of Operation Consider control-panel clarity, timer functions, alarm visibility, loading access, and the number of routine operating steps. A clear digital or dial control, readable status indicators, and simple start-up and shutdown instructions are preferred. Simple controls shorten training time and help operators use consistent heating procedures. Ask an intended operator to complete a start-up demonstration using the written instructions.
6 Review Material Compatibility Check compatibility with the product, drum material, seals, insulation, heating surface, and any required ventilation system. The operating temperature and all wetted or exposed materials must be compatible with the product’s SDS and processing instructions. Compatibility reduces contamination, corrosion, leakage, and hazardous reaction risks. Obtain material certificates and compare the proposed process with the product SDS.
7 Consider Maintenance and Total Cost Review cleaning access, replacement parts, calibration requirements, service intervals, warranty, and expected operating cost. Prefer accessible heating elements and sensors, documented maintenance procedures, and readily available standard components. Easy maintenance can reduce downtime and make long-term ownership costs more predictable. Calculate purchase price, electricity, labor, maintenance, calibration, and expected replacement costs.

Note: Temperature, power, capacity, and safety requirements vary by drum melter design and material. Always follow the product safety data sheet, equipment manual, and applicable local regulations.

Assess Maintenance, Support, and Total Ownership Cost

7 Tips to Choose the Best Drum Melter for Your Business

Maintenance should be evaluated beside melting performance. A low purchase price can hide frequent heater failures, clogged valves, and difficult drum changes. Inspect heater access, insulation panels, thermocouples, seals, and hydraulic components. Ask how quickly technicians can replace each part. Small details matter.

The U.S. Department of Energy published useful maintenance benchmarks. Its Operations & Maintenance Best Practices Guide reports predictive maintenance can save 8–12% versus preventive maintenance. Savings may reach 30–40% compared with reactive work. For a drum melter, useful monitoring includes temperature trends, heater current, cycle time, and hydraulic pressure. Deloitte Insights has estimated predictive maintenance can reduce downtime by 10–20% and maintenance costs by 5–10%. These figures are not guarantees. Actual results depend on material, operator training, and cleaning discipline.

Support quality directly affects total ownership cost. Request spare-parts lead times, technician response targets, service documentation, and operator training details. Confirm whether remote troubleshooting is available without exposing production data. Calculate energy use per heated drum, labor hours per service, consumables, planned downtime, and lost output. The U.S. Energy Information Administration reports that industrial energy prices vary significantly by region and year, so local electricity rates deserve a separate calculation. I would also test the maintenance process before purchasing. If one technician needs awkward lifting or special tools, the spreadsheet is probably too optimistic.

Scroll to Top