2026 Best Advertising Light Boxes Buying Guide?
Choosing the right Advertising Light Boxes can shape how customers notice, remember, and trust a brand.
This 2026 buying guide examines brightness, panel quality, frame construction, energy use, and maintenance. It also considers viewing distance, ambient light, installation space, and daily operating hours. A bright display is not automatically a better display. Excessive glare can make printed graphics look harsh and uncomfortable.
Saul Bass, a respected advertising and visual-design expert, said, “Design is thinking made visual.” That idea matters here. An effective light box should present a message clearly, not merely produce more light. Look for even illumination across the entire panel. Dark corners, visible hotspots, and uneven color can weaken an otherwise strong campaign.
Real purchasing decisions are less perfect. Product photographs may hide weak edges or poor cable placement. Supplier claims can also sound impressive without independent testing. Ask for lighting specifications, material samples, warranty terms, replacement-part availability, and installation guidance. Check whether the unit supports fabric graphics, acrylic panels, or interchangeable prints. Confirm its actual dimensions, not only the advertised display area.
This guide compares common formats, including wall-mounted, freestanding, countertop, and outdoor-rated models. It also reviews LED performance, heat management, cleaning requirements, and long-term operating costs. Budget remains important, but the cheapest frame may become expensive after repeated repairs.
No buying guide removes every uncertainty. Still, careful measurements and honest comparisons can prevent costly mistakes. The best Advertising Light Boxes balance visibility, durability, visual consistency, and practical maintenance. That balance deserves more attention than a dramatic brightness claim.
Classify Light Boxes by Format, Illumination, and Viewing Distance
2026 Best Advertising Light Boxes Buying Guide
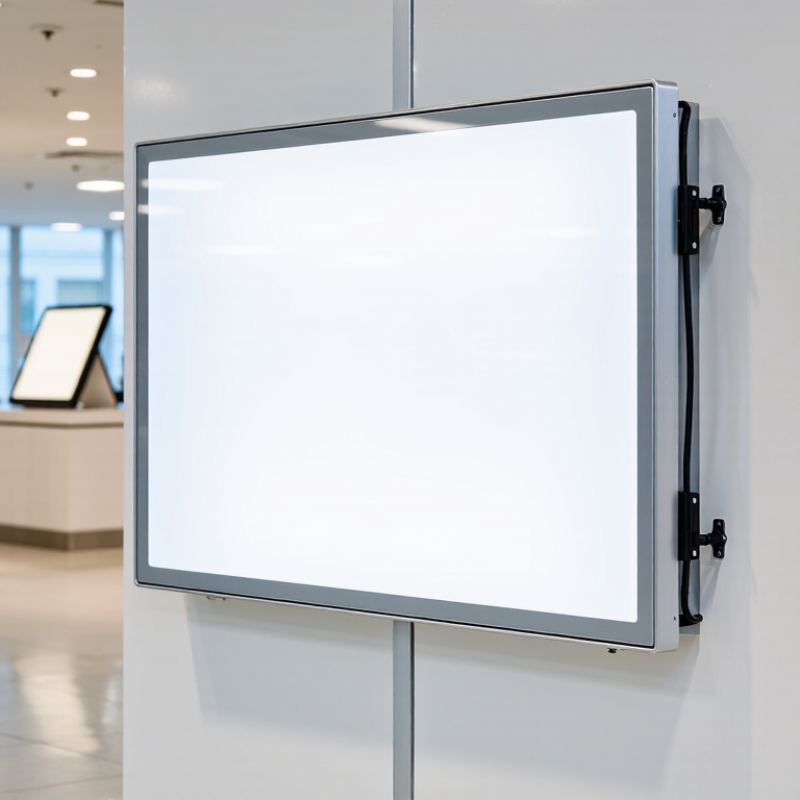
Format determines how people encounter an advertising light box. Single-sided units work well against walls, while double-sided models attract traffic from both directions. Freestanding frames suit entrances and retail aisles. Hanging formats improve visibility above crowded displays.
Measure the floor area first. A beautiful frame becomes a hazard when walkways feel narrow.
Illumination changes the message. Edge-lit light boxes create slim profiles and even brightness across smaller graphics. Backlit units usually provide stronger impact for large posters. Check brightness consistency, heat control, and access for graphic replacement. Uneven lighting can make a premium photograph look cheap.
In my installation experience, installers often trust the center of the panel and ignore dim corners. That mistake is easy to miss under showroom lighting.
Viewing distance should guide the graphic and light source. At one meter, fine text and sharp image details matter. At three to five meters, larger letters and stronger contrast perform better.
Very bright illumination is not always better. It can cause glare near glass entrances or reflective floors. Ask for measured brightness, not vague claims. A test sample helps, though one sample cannot represent every production size.
I once approved a compact display too quickly; the color looked accurate indoors but appeared dull beside daylight. Check it at the real viewing distance, during actual operating hours.

Set Brightness: 800–1,500 cd/m² Indoors; 2,500+ Outdoors
Choosing an advertising light box starts with luminance, not the highest possible number. For indoor corridors, shops, and exhibitions, 800–1,500 cd/m² usually provides clear graphics without excessive glare. Outdoor installations need stronger output, often 2,500 cd/m² or higher, because sunlight can wash out printed faces and acrylic panels.
The U.S. Department of Energy’s Solid-State Lighting R&D report identifies LED efficacy above 200 lumens per watt in advanced laboratory conditions. That figure matters because higher efficiency can reduce heat and operating costs at the required brightness. However, laboratory performance is not the same as a finished light box. Diffuser quality, LED spacing, panel depth, and viewing angle can change the result noticeably.
Measure the panel at its surface.
In field testing, I would check luminance at the center and four corners, preferably with a calibrated luminance meter. Uneven brightness becomes obvious on large white backgrounds, especially near LED rows. The Illuminating Engineering Society also treats glare, contrast, and adaptation as practical visual factors, not simple brightness targets. A 2,500 cd/m² outdoor box may still look weak beside reflective glass or direct afternoon sun. Conversely, excessive indoor brightness can create reflections and visual fatigue. I have seen specifications promise impressive output, yet the installed panel looked patchy. That gap deserves attention. Temperature, dust, aging LEDs, and tinted covers can reduce real performance over time. A buying decision should therefore request measured brightness, uniformity data, operating temperature, and a replacement plan.
Verify Color Quality with CRI 80+ and 50,000-Hour LED Life
2026 Best Advertising Light Boxes Buying Guide
A bright light box can still display weak colors. For advertising, that is a costly problem. Check the specification sheet for a Color Rendering Index (CRI) of 80 or higher. CRI 90 is preferable for food, cosmetics, clothing, and skin tones. Ask for test data, not only printed claims. A reliable supplier should identify the measurement method, sample unit, and testing conditions. In real inspections, compare the illuminated graphic with a reference swatch under neutral daylight. Reds often reveal poor color rendering first.
LED life also needs careful verification. A 50,000-hour rating sounds impressive, but it may describe the LED chip, not the complete light box. Heat, dust, power quality, and long daily operation can shorten performance. Look for tested lumen maintenance, thermal design details, and a clear warranty. Ask whether the rating means 70% of initial brightness remains. That small detail matters. I have seen displays remain lit while becoming visibly dull, which is technically operational but commercially disappointing.
Tips: Request a sample before ordering multiple units. Photograph the sample beside the printed artwork. Check color uniformity from the center to each corner. Inspect it after several hours of operation, when heat appears. Also ask for replacement access and driver specifications. A minor weakness is easy to overlook during a showroom visit.
Check UL 48, IEC 60529 IP65, and 4000K–6500K Specifications
2026 Best Advertising Light Boxes Buying Guide
A reliable advertising light box begins with safety and environmental ratings, not brightness alone. UL 48 applies to electric signs and evaluates construction, wiring, grounding, and fire-related risks. Confirm that the complete light box assembly is covered, rather than trusting a single certified component. Requirements can vary by installation location, so qualified electrical review remains sensible.
IEC 60529 IP65 means the enclosure is dust-tight and protected against water jets. It does not mean the light box can survive flooding or temporary immersion. Check seals, cable entries, drainage, and panel joints. A poorly fitted frame can weaken an otherwise valid rating. I have seen attractive displays fail because moisture entered through a small rear opening.
Tips: Ask for current test documents and installation instructions. Match 4000K–6500K to the viewing environment. Around 4000K often looks balanced indoors, while 6500K creates a sharper, cooler appearance outdoors. Compare brightness across the whole panel, not only at its center. Also inspect color consistency; uneven LEDs may become obvious on pale graphics. My earlier preference for maximum brightness was not always correct, because glare can reduce readability.
2026 Best Advertising Light Boxes Buying Guide: UL 48, IEC 60529 IP65, and 4000K–6500K Specifications
Practical specification reference for selecting safe, durable, and visually consistent LED advertising light boxes
| Specification / Buying Dimension | Recommended Requirement | Why It Matters | Verification Checklist |
|---|---|---|---|
| Electrical safety standard | Look for equipment evaluated to UL 48 where UL 48 is applicable to the electric sign and the installation jurisdiction. | UL 48 addresses construction and safety requirements for electric signs, including wiring, components, enclosures, and installation-related risks. | Request a valid certification or listing record, product marking, wiring diagram, installation instructions, and evidence that the exact model is covered. |
| Ingress protection | IP65 or higher for outdoor-facing enclosures, when the complete assembled product has been tested accordingly. | The first digit 6 indicates dust-tight protection. The second digit 5 indicates protection against water jets from any direction; IP65 is not protection for temporary immersion. | Confirm the test report applies to the complete light box, including doors, seams, cable glands, connectors, and mounting configuration. |
| Color temperature | 4000K–6500K; choose the exact value according to the artwork and viewing environment. | 4000K–4500K produces a neutral appearance, while 5000K–6500K appears cooler and whiter. Consistent color temperature improves panel-to-panel uniformity. | Ask for the nominal CCT, tolerance, color-consistency data, and a sample panel viewed with the actual printed or translucent graphic. |
| Light source | Use LED modules or LED strips designed for sign illumination, with documented electrical ratings and thermal limits. | LEDs generally offer lower energy use, longer service life, and less heat than fluorescent sources, provided they are properly driven and cooled. | Check LED layout, module spacing, rated current, operating temperature, replacement availability, and compatibility with the power supply. |
| Illuminance and uniformity | Specify target brightness and uniformity based on the graphic, viewing distance, ambient light, and box depth; avoid selecting by wattage alone. | Excessive brightness can wash out artwork, while insufficient brightness reduces readability. Poor spacing can create hot spots and dark areas. | Request measured illuminance data, uniformity results, viewing photographs, and a full-size sample for shallow or unusually shaped cabinets. |
| Power supply | Use a correctly sized constant-voltage or constant-current driver, according to the LED system design, with suitable input and output ratings. | An unsuitable driver can cause flicker, overheating, premature LED failure, or unsafe operation. | Verify input voltage, output voltage/current, total load, reserve capacity, efficiency, overcurrent protection, grounding, and enclosure location. |
| Input voltage and energy use | Select the local mains input option and calculate total connected load from the actual LED quantity and driver efficiency. | Accurate load calculations support correct circuit design, operating-cost estimates, and safe installation. | Record rated input voltage, maximum wattage, power factor where relevant, circuit protection, and estimated annual operating hours. |
| Frame and enclosure | Choose corrosion-resistant aluminum or treated steel with secure edges, service access, and adequate rigidity for the panel size. | The enclosure protects electrical parts, maintains alignment, and affects heat dissipation and long-term appearance. | Review material thickness, surface treatment, corner construction, drainage provisions, fasteners, weight, and wind-load requirements. |
| Graphic face and diffuser | Use a UV- and weather-suitable translucent face material with appropriate diffusion for the LED spacing and box depth. | The face determines color rendering, glare, image quality, cleaning needs, and resistance to yellowing or cracking. | Confirm material type, thickness, light transmission, UV resistance, flame-performance requirements, replacement method, and print compatibility. |
| Color rendering | Prefer a documented CRI of 80 or higher for general advertising; consider higher CRI when accurate product colors are important. | CRI indicates how naturally many colors appear compared with a reference light source. It does not replace testing the actual printed graphic. | Request CRI data, color samples, and a viewing test under the selected CCT and diffuser. |
| Flicker performance | Select a driver and LED system with documented low-flicker performance, especially for retail, transport, broadcast, or camera-visible locations. | Visible or camera-detectable flicker can affect comfort, photography, video recording, and perceived quality. | Ask for driver flicker data or test results at the intended dimming level and mains frequency. |
| Outdoor operating conditions | Specify the expected ambient temperature, humidity, sunlight exposure, rain, snow, salt, dust, and wind conditions before ordering. | Environmental stress affects seals, plastics, coatings, drivers, LED output, and service life. | Confirm the operating-temperature range, condensation control, corrosion protection, drainage, ventilation, and installation orientation. |
| Dimming and controls | Use compatible dimming or scheduling equipment only when the LED driver is designed for that control method. | Controls can reduce energy use and adapt brightness to operating hours, but incompatible controls may cause flicker or driver damage. | Check PWM, 0–10 V, DALI, timer, photocell, or other control compatibility as applicable; verify minimum dimming level. |
| Maintenance and serviceability | Choose front- or rear-access construction that permits safe cleaning, LED or driver replacement, and graphic changes. | Easy service reduces downtime and labor costs over the life of the sign. | Check access-panel design, replacement parts, connector labeling, isolation procedure, spare-part availability, and maintenance instructions. |
| Documentation and installation | Require complete technical documentation before purchase and use a qualified installer for mains-voltage work. | Correct documentation supports compliance, safe commissioning, troubleshooting, and future maintenance. | Collect datasheets, wiring diagrams, mounting details, grounding instructions, load calculations, test reports, and local permit requirements. |
Compare Energy Use, Warranty, and Total Cost per Display Area
2026 Best Advertising Light Boxes Buying Guide?
Compare energy use, warranty, and total cost per display area before choosing a light box. The U.S. Department of Energy reports that LED systems can deliver much higher efficacy than traditional lighting. The International Energy Agency also notes that LEDs can use up to 75% less electricity than incandescent lamps. Yet wattage alone can mislead. Measure watts per square metre and brightness uniformity.
For example, a 1-square-metre display using 40 watts for 12 hours daily consumes about 175 kWh yearly. At $0.16 per kWh, electricity costs approximately $28. A 65-watt model costs about $46 under the same conditions. Small differences multiply across a retail network. Real conditions matter. Dust, heat, and long operating hours can change results.
Warranty terms deserve equal attention. Check coverage for LEDs, power supplies, colour shift, labour, and shipping. A five-year warranty sounds strong, but exclusions may weaken it. The U.S. Department of Energy recommends evaluating lighting by performance, maintenance, and lifecycle cost, not purchase price alone.
Build a five-year calculation using equipment cost, energy, replacement labour, and expected downtime. I would also request measured luminance data, not only catalogue claims. A cheaper box may consume less power, but uneven illumination can reduce advertising value. That trade-off needs reflection.